
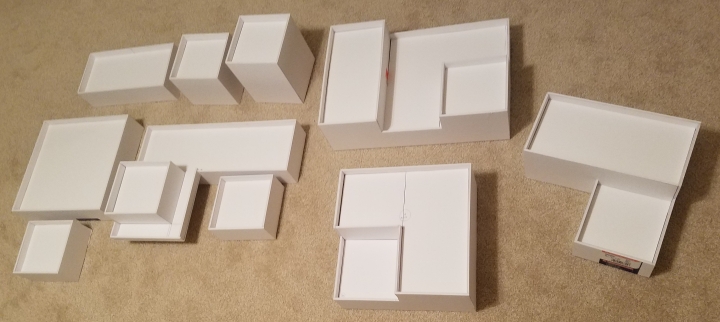
Here is a shot of the buildings I will be discussing today. I love these buildings for one main reason, every piece of terrain that I build is judged based on modularity and usability. As you will see in this post, I can and will get a ton of mileage out of these simple buildings.
When I first started on my terrain building journey, I looked for some templates to get a feel for how to build something. I strongly suggest doing this if you have not built anything before. I say that for two reasons:
First, you will learn how easy it all really is in the end. It will get you past that fear of the unknown hurdle. Terrain building really is simple and as I have said before, I find it less intimidating than painting a miniature.
Second, you get a test piece. Having a piece that you know you will never put on a table is liberating. You do not have to worry about screwing anything up, because it does not matter with a test piece. It lets you try out techniques and measurements and see what works.
For example, I used the below test piece (I wish I could remember the website I downloaded it from so I could give them credit. I cannot find my notes on it.) and discovered that half an inch of cover only came up to my miniatures’ knees. It did not work for me. So that let me build off of 3/4th of an inch going forward (the standard I use to this day). Sure, you could measure that without building anything; however, it did not dawn on me at the time. I had to see it to know what I wanted.
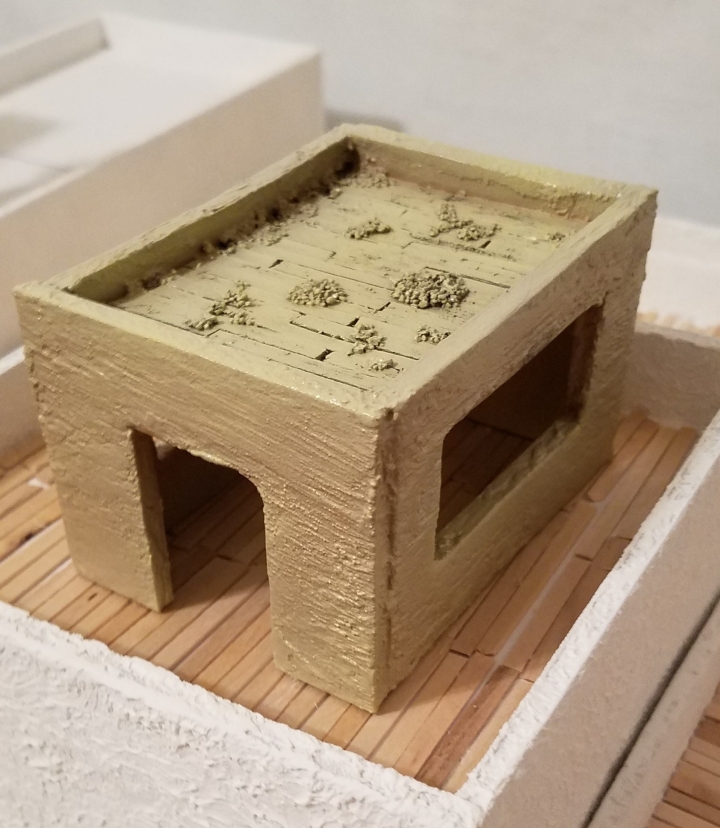
I will refer to the image above as I go through my build explanation. I learned a lot from making that piece. One thing I learned is that I had no interest in interiors. Bump that noise.
So, let’s dive in. First things first, I had a vision of my buildings. I wanted highly modular pieces that could be used in a variety of ways and would not take up a ton of space. Unique looking buildings are great, but they serve limited purposes. I wanted something I could make into anything.
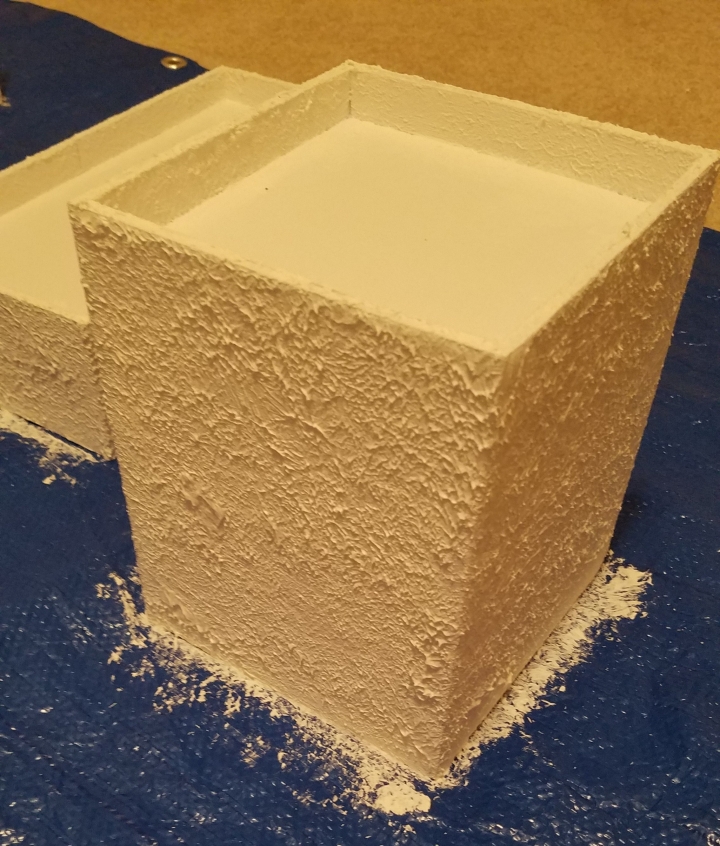
Design choice one: flat squares. Every building is in 6” increments, including wall width. There are also no doors or windows or any decoration on the walls. This is done so that buildings could be placed right next to each other in order to create rooftop battles and/or larger buildings. Check out the image below to see what I mean.
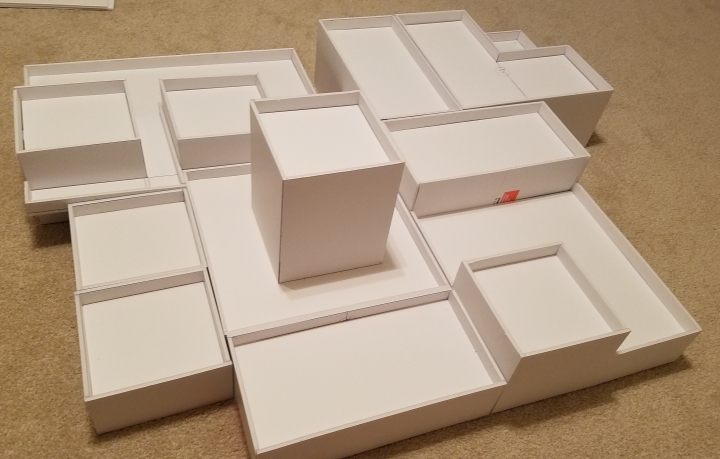
In this photo, I even stacked one building in the middle of the other. The combinations are nearly endless. Now, this does make the buildings rather bland.
Design choice two: clips. So, this is a work in progress and at the time of this writing, I only have one clip designed, but I will make a post on them once I get rolling on the clips. So what are clips? Well, simply image a “U” shaped hook that I could hang onto a wall to place an awning or a billboard or a fire escape. That’s it. I also have an idea of using foam core and creating a clip that would fit on the bottom of a building to allow me to place doors wherever I wanted. Same idea with staircases, bridges, etc. An early version of the bridges is in the image below.
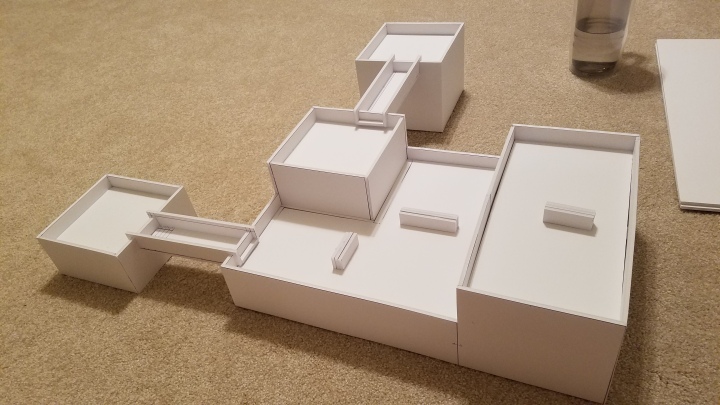
Design choice three: standard heights. So, in addition to 6” increments, I wanted to be able to place separate buildings next to one another so that clipped bridges could attach without issue. I also knew that I wanted standard stairs that could attach to any building whether from the ground of from a first floor to a second. So, I created a max height of 3” increments. This means that roof height of each level would be ¾” below that. So single story buildings have a roof height of 2 ¾” and a wall height of 3”. As I made two and three story tall buildings, I just had to make sure my measurements followed suit (example: second story walls are at 5 ¼” with roofs at 4 ½”).
Supplies:
Wal-mart Elmer’s foamboard – about $2 each (this stuff is more sturdy than DollarTree Redi-board)
Krylon Colormaster Paint + Primer – about $5 each. I got black, brown, tan, and white.
Ace Hardware Light Spackle – about $5. Just drywall filler.
Sandpaper
Respirator- about $20. Spray paint and sanding dry wall filler will kick up a bunch of stuff you do not need in your lungs.
Aleene’s Tacky Glue – $3. Stronger than regular PVA.
Metal ruler
Sharp Retractable Knife- $5 at Ace. Never skip out on a sharp blade. Change them often. Later I will post about the first sci fi tiles I started making using an old blade. Took forever and the edges were all jacked up. As soon as I put a new blade in (after I had made most of the tiles) it cut like butter, smooth edges and all. I will always put a project on pause if my blade is only okay. Never again will I cut with a dulling blade.
Coffee Stirrers- $12 online for a few thousand.
Woodland Scenics Bassalt, Medium Buff- $5 maybe.
Apple Barrel craftpaints- black, brown, green, yellow
Elmer’s White Glue- $3
Wood Stain- I need to find the bottle or my notes. It was like $10 online though. In retrospect… you could maybe skip this and just do a more focused brown wash maybe. The stain is pretty good though and I would use it again.
To be honest, I would do some things differently today, but then again that was over a year ago. I’m sure this blog will look different in a year too. It’s all part of growing.
What I did:
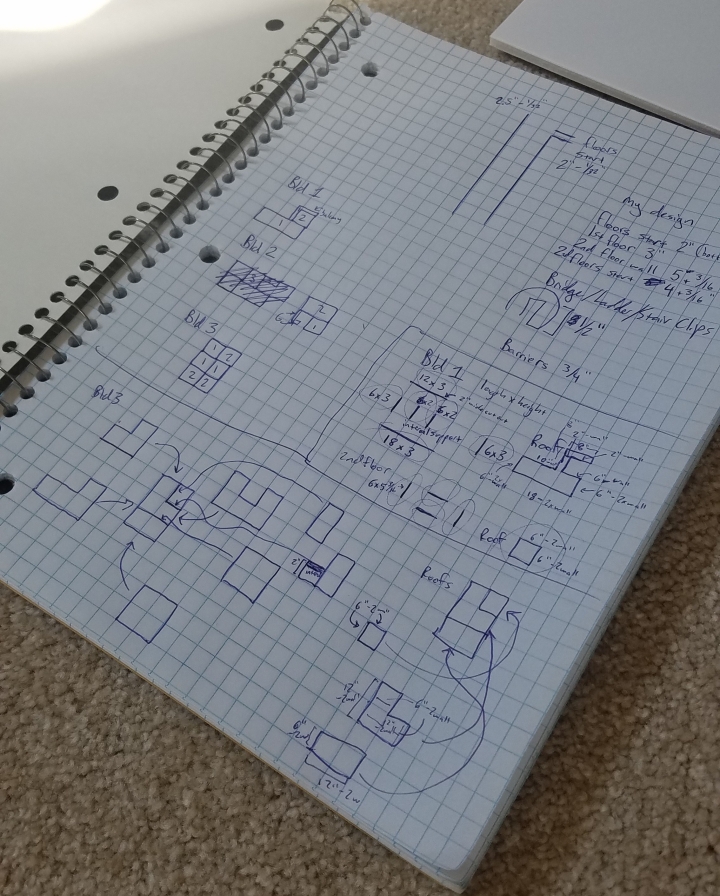
First, I got a pencil, a ruler, and my foam board. I also had a sheet of paper where I planned how many different squares I would need to do all my buildings. Some were simple, others had various height sections right next to one another. I planned, measured, measured again, then cut. This took the longest time, but it is the most important and the hardest to correct without starting over. In a later post you will see where my failing to follow the measure rule caused me to make some last minute adjustments to get things to line up.
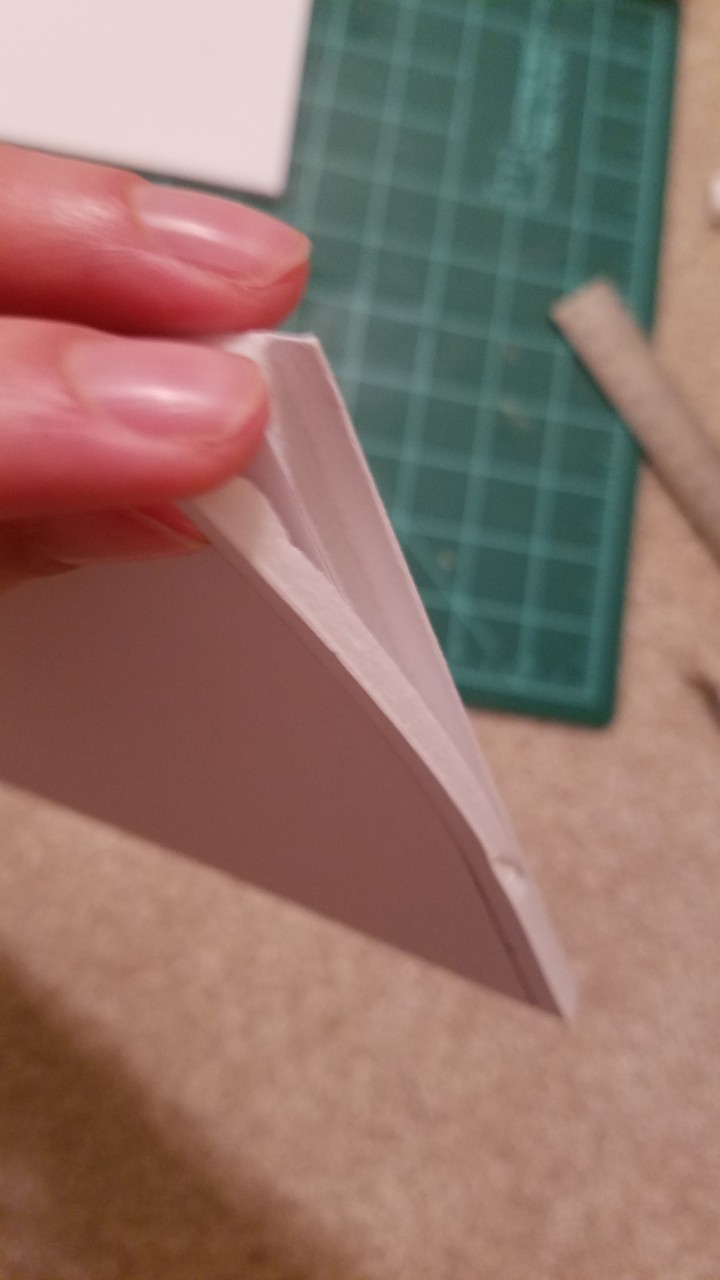
I also cut rabbits along edges to hide the ends of the foam board. This takes extra planning and cutting, but it is well worth the effort.
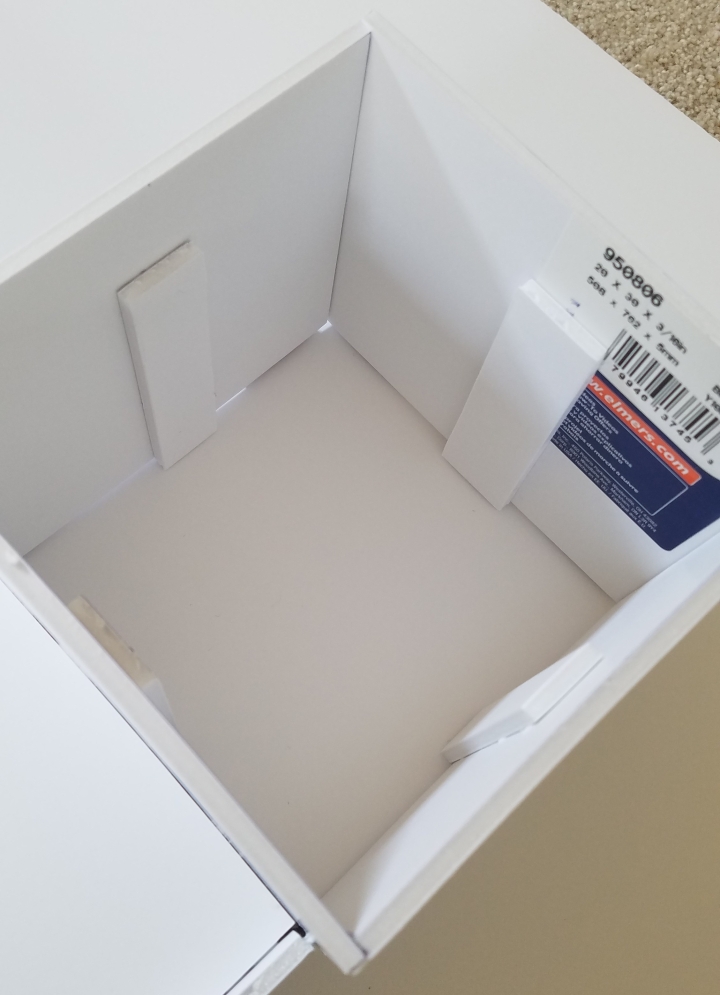
Next, I started gluing things together. Be patient and make sure your corners are lining up. One thing I learned here is that my roof level really needed some supports, I could not just glue the edges and hope that it fit. So, I used scrap foam on the underside to prop the roof up. As time went on, I got better about placing these intelligently.
Here they all are.
I decided to go with a desert/adobe theme. I could use this in fantasy, modern, and sci fi settings. So, even though my game is sci fi based, I went for the most bang for my buck. Next, I got a throw-away brush and dabbed on filler all over the walls of each piece.
Once this dried, I sanded the filler down just a little bit to remove the sharp/rough edges.
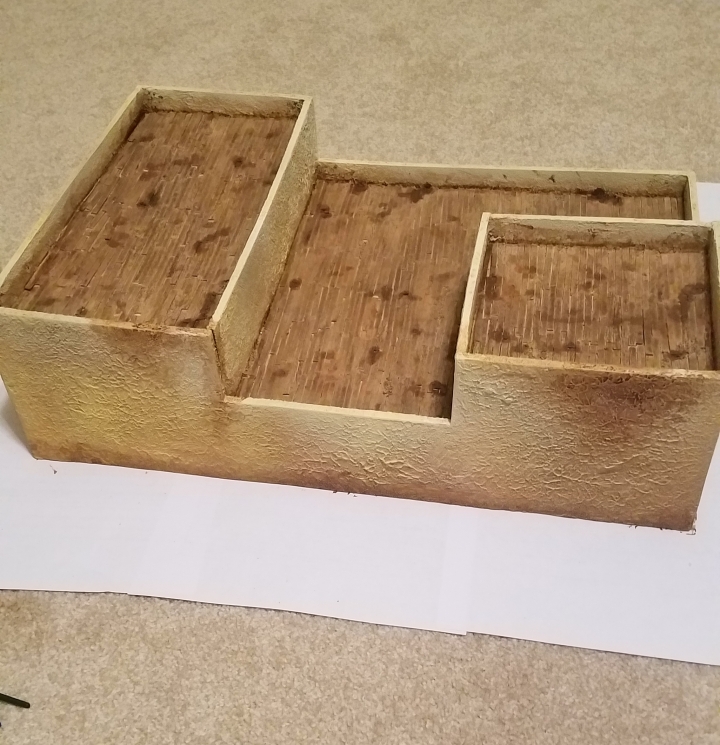
Now, I had to decide what the roof would look like. I tested out coffee stirrers on my test piece with some clumps of basalt and liked the look of it. So, that was that. I roofed the pieces, which took forever. I got more lazy as time went on, but I think it all ended up looking alright. I have a picture of this a little later.
Once the roof was in place, I coated any exposed foam in Elmer’s white glue to protect the foam from the spray paint. When that was dry, I took the pieces outside and hit some with a black primer first, then I decided to skip that step. I then hit everything with a brown primer (the already black primed ones got a lighter coat to keep some of the black for shadows). I then angled the tan spray paint and hit some highlights. I finished with a very light application of white spray paint.
Honestly, I should have hit the walls with a wash, but at the time I was following a tutorial I saw on the Youtube channel RubbishInRubbishOut. It is a lot faster than if I washed it, so that’s something. Truthfully, I know these are not show stoppers; however, at the end of the day, terrain should blend into the background a bit and let the models shine. So, I don’t mind the simple paint job and the speed of it… man, it is worth it.
Next, I mixed up some brown craft paint with about ten times as much water and a drop of dishsoap to make a wash and washed the roof sections. I then went in and dabbed different colors of paint to make stains.
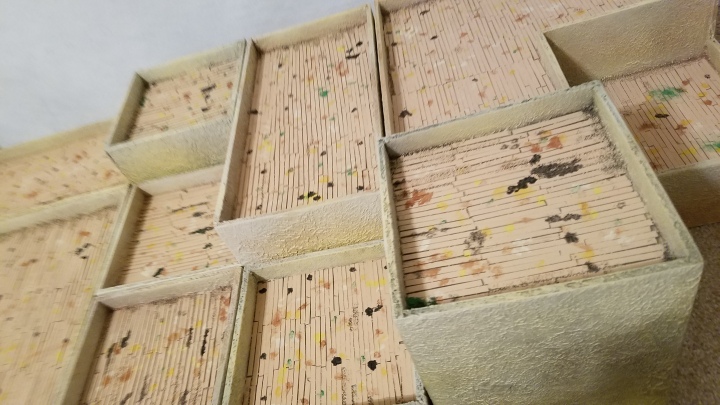
I was not happy with the result, but people online when I posted the question on a Facebook group liked it. I ultimately went back and dabbed brown paint over most of the other colors and did a second brown wash.
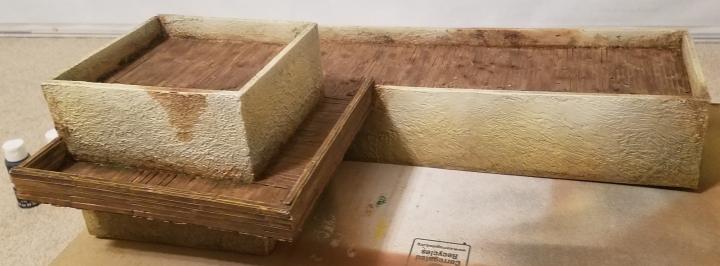
Finally, I took the wood stain and feathered it across the bottom edges to make them look weathered. I also selected some areas on the wall to apply the effect. You can see it more clearly on this piece below. I focused the effect on the inside of rooftop walls too.
So, there you go. The whole thing took three or four weeks to do. I was working on it at night mostly and hesitating a lot. If I focused, I bet I could do it all in less than two weeks even sticking to the same time-frames I used back then.
I recently have built some pretty cool bridges meant to go over rivers that I made sure could also be used on these buildings. Stay tuned for the clips post as I develop and make those!

I love foam core for terrain. It’s so cheap and versatile. There’s even a whole bunch of special tools you can buy for cutting it precisely. Speaking of, great idea on the rabbit joint. I’ll definitely do that the next time I make some buildings.
Also, awesome job on these!
LikeLike